Account Signup
Cuemby Cloud Account Setup Guide
This guide provides a step-by-step tutorial to help you create a Cuemby Cloud account, set up billing, and verify your account.
Register Account
- Click here to get started.
- Enter the necessary details, such as your name, email address, phone, and password. Make sure to accept Terms And Conditions.
- Click on Create Account to proceed to the next step.

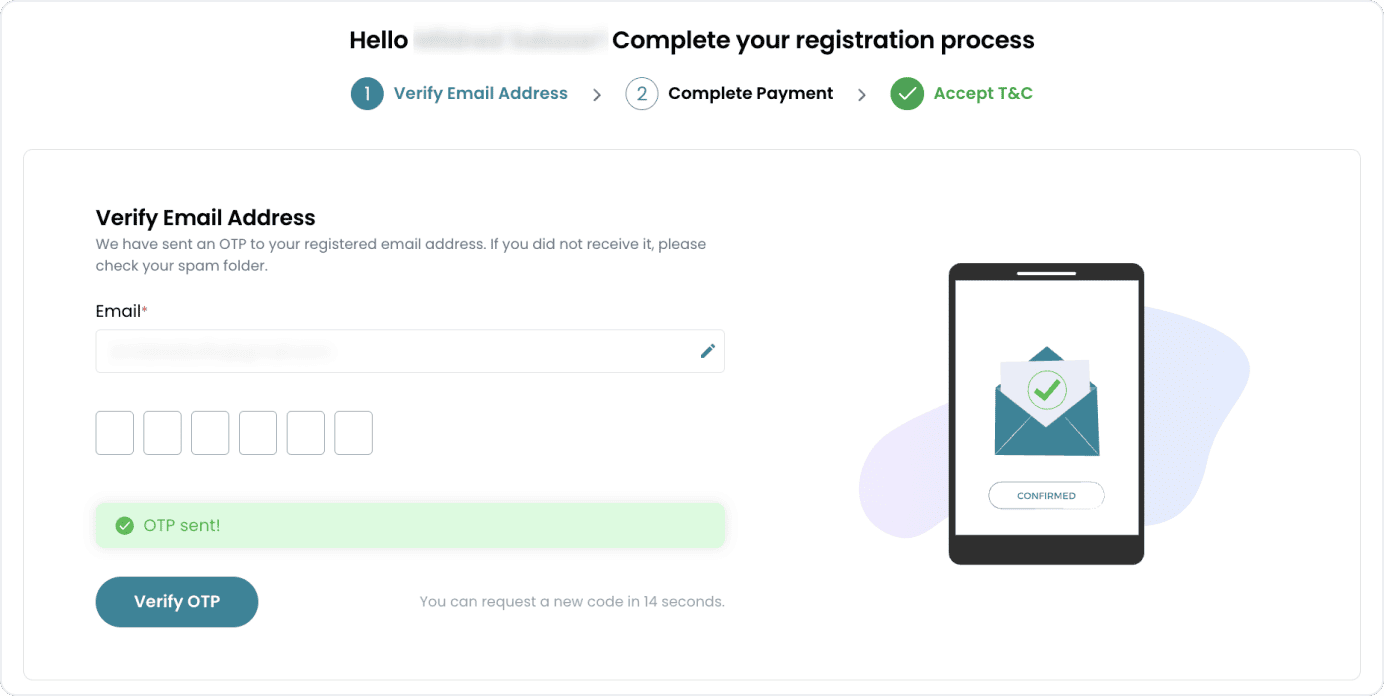
Verify Your Email
- Check your email inbox for a verification email from Cuemby Cloud containing a One-Time Password (OTP).
- Enter the OTP in the provided field on the website.
- Click Verify OTP to confirm and proceed to the billing setup.
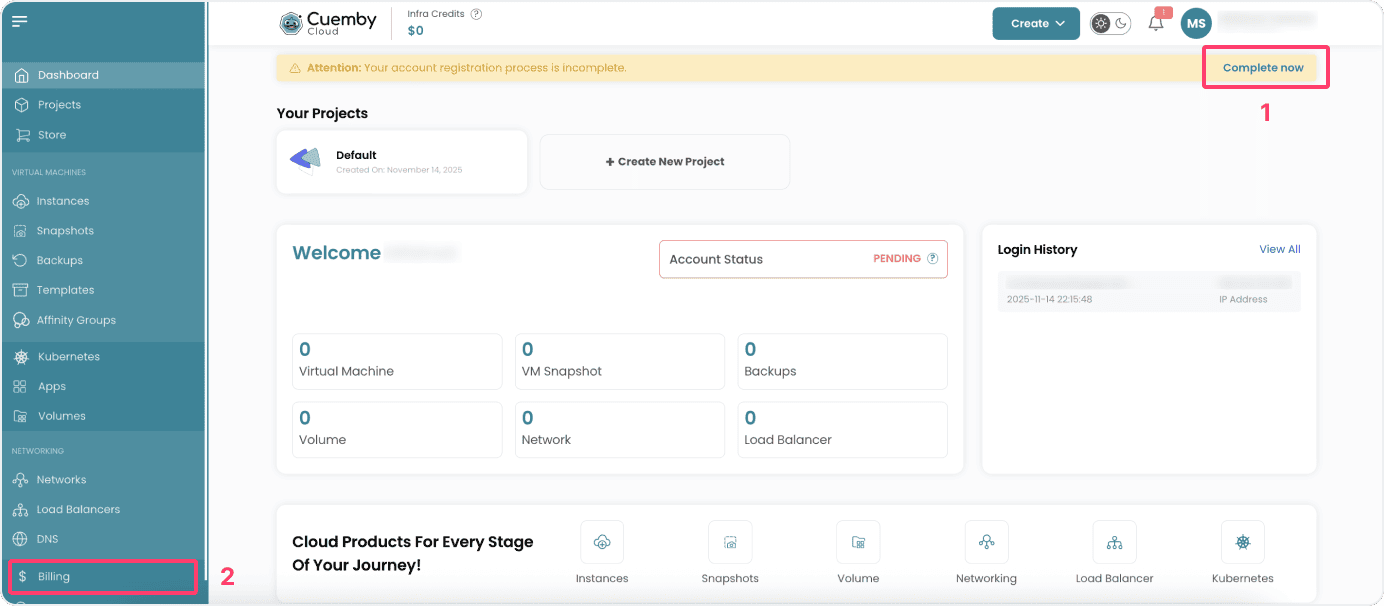
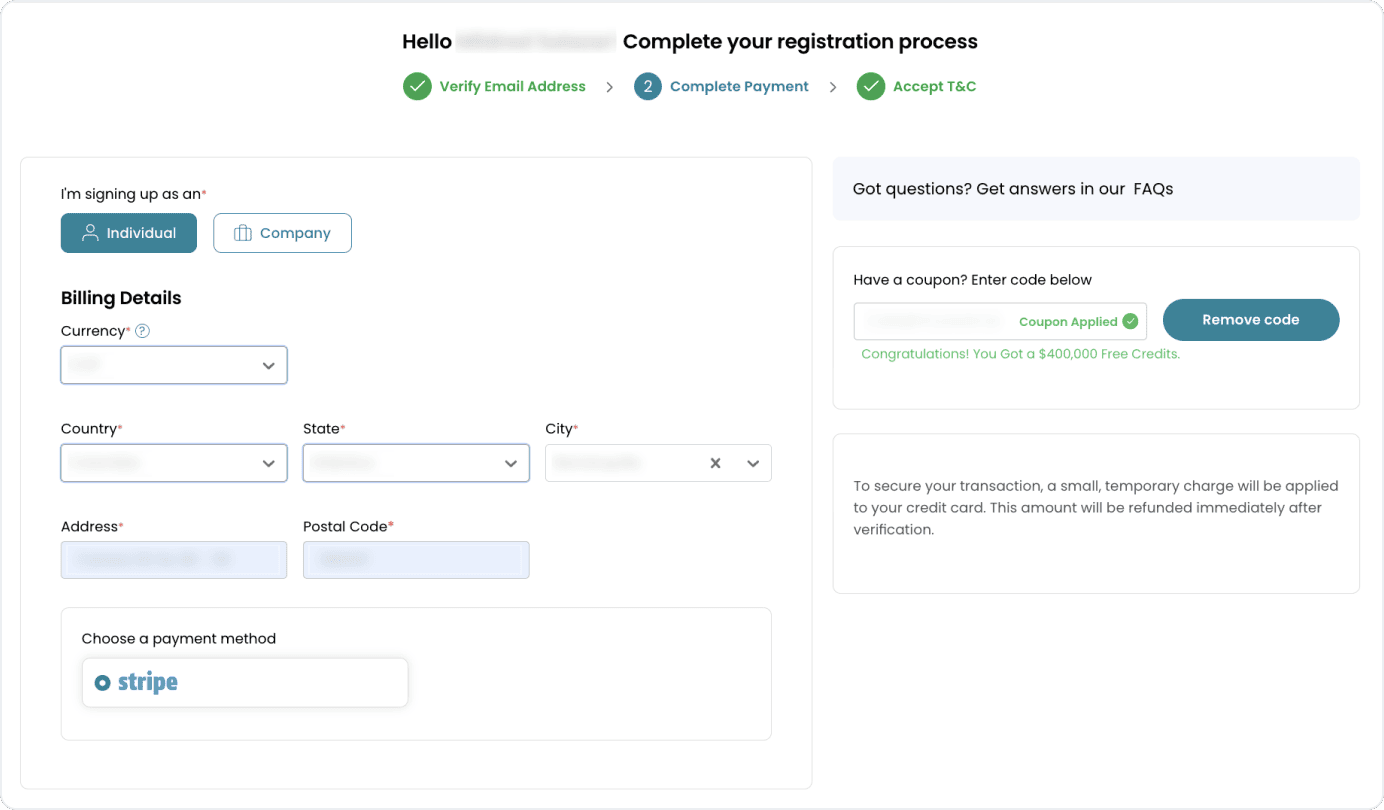
Set Up Billing Method
- After verifying your account, you’ll be prompted to set up your billing information. A yellow alert should appear on the top of the dashboard (1) or you can go to Billing on the side menu (2).
- Choose a billing type:
- Individual: For personal use; enter details like your address.
- Company: For organizational use; provide details such as your company name, website, and address.
- If you have a coupon, redeem it at checkout to receive a discount or promotional offer.
- Choose your payment method.
Final Steps
-
Review the Terms & Conditions of the platform carefully.
-
Accept the terms to complete the registration process.
-
Your account status will display as active after finishing all the process.

Conclusion
Setting up your Cuemby Cloud account is a straightforward process. By following the steps outlined in this guide, you can successfully register, verify your email, configure billing, and choose a payment plan that best suits your needs. Once completed, you’ll have full access to the Cuemby Cloud dashboard and its features, enabling you to manage your resources efficiently.